Friday, October 9, 2009

The Frame is Done!

So when I last spoke to you, I said I was hoping to get the frame completely painted by last weekend. Well I was able to get the primer on the frame before the weather turned bad. It rained all week and it looked like I was never going to get the frame finished painting. But today (Friday) turned out to be a great day, and I was able to get the frame finished painting.

Very Shiny Frame
Here are the A-Arms all cleaned up and ready for paint.

Here they are with the first coats of primer on them.
Before doing the final paint on the frame. I had to grind off the lip inside the spring buckets on the frame, so the air bags will fit.
After Grinding

Before Grinding

I found this chair in this yard and decided to clean it up and paint it black.

What do you Think?


Saturday, October 3, 2009

Start of the Frame painting

Well It's has been about ten day since I last worked on the Galaxie. So my plan this weekend has been to get the frame painted, and ready to start putting parts back on. So on Friday I loaded up the frame on a trailer and took it down to a car wash, where I socked the frame in grease remover, and lots of hot water. Then brought the frame back, where I set it up on jack stands up side down.
Today I sprayed two coats of rust encapsulater on the frame; which took a few hours to do. The frame has to sit for about eight hours before spraying a coat or two of primer over the encapsulter. Before putting the primer on, the frame has to be sanded with 320 grit sand paper. Then once the primer sets up (about 2 hours), I can spray on the final black epoxy paint. I hope to have this done on Sunday.

Looks Pretty Good Has a flat look to it


Saturday, September 19, 2009

I worked on the Galaxie Friday & Saturday for a total of about 13 hours. I was able to put a wood floor under the frame, to cut down on the dust and dirt. I pressed out all the bushings, and ball joints from both the upper & lower A-arms, and ordered new ones. I sanded both the doors, one fender and the front cowl piece with 180 grit sand paper. Today I painted all four parts with sealer, and I started sanding the hood. Here are some pictures of the doors, fender, and cowl after being sprayed with sealer, and the hood sanded with 180 grit sand paper. I circled with a marker two low spots on the hood that will need to be filled, before being sprayed with sealer.


Wednesday, September 16, 2009

Tonight I final got the lower A-arms off the frame, thanks to a friend who works for the city shop, and who was kind enough to let me use a 1 & 7/8" wrench. I can not believe their was a nut on this car, that required that big of a wrench! Now all I have to do is get the frame bead blasted this weekend. Sorry no pictures...

Sunday, September 13, 2009

Okay I am down to the removal of just two bolts and the frame will be ready to be bead blasted. I do not have a socket big enough to remove the front bolt on the arms, and so I will make a trip to NAPA on Monday. I am almost to the point where all I will have left to do is start putting the parts back on.

I was able to get the rear end off today with little to no problems at all. I need to take the springs off the axle, and then disassemble the rear end, so I can paint it and get it ready to put back on the frame. The plan is to order the air bag system from Air Ride here in the next few weeks.

I took the front drum brakes off the spindles today, becasue I will be using disc barkes on the front and keeping drums on the back. So I need to clean up and paint the spindles before putting the disc barkes on them.


Friday, September 11, 2009

Okay does anyone have any idea how to remove the lower A-Arms from the frame? I was able to get the upper A-Arms off and the spindles, but I can not get the lower A-Arms off the frame, and I have no idea how to get them off?


I sanded the door today and put some body filler in the low spots; which I will sand down tomorrow.


Monday, September 7, 2009

Trackers are so "cool"!!! It made pulling the engine so easy, and really cut down on how long it took to pull.

Check out the 45 + years of dirt and grime on the steering components. I removed all the steering parts, and took them to a car was to clean them up before I paint them.

All I have left is to remove all the rear and front suspension, but first I need to per-fit the air bag system before the removal. Then I will remove the suspension before having the frame bead blasted, and get it ready for a new coat of black paint.


Friday, September 4, 2009

Today I put down four coats of a black primer sealer on one door and one fender. The sealer is to seal the door from any rust before putting a top coat primer/filler. I have a few spots to fix before putting the next primer on the door and fender.


Here is a video of the door and fender after the four coats of sealer.


Sunday, August 30, 2009

This weekend I was able to get a lot of work done on the Galaxie. I was able to get the passenger side front fender and both doors sanded, filled the low spots, and re-sanded with 80 grit sand paper. Next weekend I will get those parts sanded with 180 grit sand paper and they should be ready for primer.

But today was where the real work was; which was getting the body off the frame with no help and no damage to the body. I put the body on the ground so I can sand the roof of the Galaxie, and then I will put it up on a stand that I built later on down the road.


Wednesday, August 26, 2009

I filled in the low spots in this door today with body filler and sanded it smooth. The door has been sanded with 80 grit sand paper and I will sanded it with 180 grit sand paper before priming the door.


Today I built some door and fender stands for when I prime and paint the car. My idea is that I will prime and paint the Galaxie in pieces. But when you paint parts such as fenders and doors, you need to paint them in the same position they would hang on the car. So I came up an idea for making that stands, and built them today.


Friday, August 21, 2009

Today I worked on sanding the driver's side door using a 12" hard sanding block with 80 grit sand paper. First I put some guide coat on the door and then sanded the door. The guide coat is great for showing where the low spots are located, and I recommend everyone use it when sanding. Once I get the low spots leveled, I will sand the door again with 180 grit sand paper, and then the door will be ready for primer.

Saturday, August 15, 2009

Well its been a couple of weeks since I last posted anything about the Galaxie. So here are a few things I did the past two days. If you noticed I have put down a floor under the Galaxie; which has helped with the dirt. I took a couple of days off and went to Kingman AZ (about 700 miles from me), and bought the glass I needed for the Galaxie. A guy named Steve in Kingman likes to work on Galaxie's and had the glass for my Galaxie. Steve sold me the three pieces of glass for $100.00; which could have cost me over $400.00 new.

I worked on the passenger side front fender today. In the picture below, you can see where I did some work on a section. I think I still need to work on this section with the dolly and hammer.

Check out my home made fender stand I made today. It will be great for working and priming the fender.

In this picture you can see where I bumped out the small dent that was on the front part of the fender. If you notice I sanded the area to the metal and feathered back the paint, and it's ready for body filler.

I put the body filler on the area, let it sit for about 30 minutes, and the I first sanded with 36 grit sand paper on a sanding block. Then I sanded it again with 80 grit sand paper on a block making sure to feather in the edges. Once the fender is completed I will sand the interior fender with 180 grit sand paper with a block, getting it ready for primer.

Here is some video of the fender and the area I worked on today. The area will need another small amount of body filler again with some sanding.

Monday, August 3, 2009

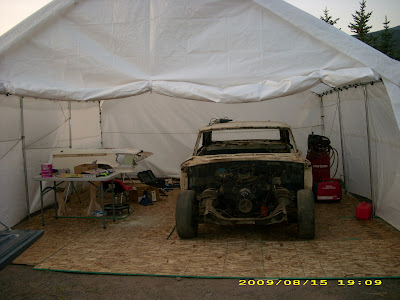
Okay so it has been about a week since I last posted something. I bought a canopy for the Galaxie to rest in. So this weekend I put up the canopy and put the Galaxie in once the canopy was up. Now all need to do is put in the floor and I will be set to work on the Galaxie.

Friday, July 17, 2009


Today was a great day for taking a Galaxie apart. I was able to get the driver's side door off, some of the trim molding, all of the engine parts; such as the alternator, power steering pump, carburetor, and fuel pump. But today I was able to get all the glass out of the Galaxie. Some issues today, were two bolts that I could not get off the front bumper brackets still on the bumper, and three body bolts that I could not get off? So I soaked them in wd-40 and will just have to see tomorrow if they come off.


The engine is all that is left in the front.


The parts are piling up.


Check out the door, but notice all the glass next to the door. Don't worry that John Deer has not moved in about 20 years.


I am getting to the point where all I will need to do is get the body off the frame, and then start working on sanding and straightening the body, and working on the frame. But I need to start working on buffing out all the trim parts.


Thursday, July 16, 2009

Today was not a great day working on the Galaxie. I only worked about three hours, and really did not get much done? I was able to get the driver's side window off, and some trim parts. I did a little sanding to the hood, and removed some of the electrical wiring from the engine compartment. I took the dash gauges home and cleaned them up. The blue casing will be painted the same color as the exterior (metallic dark green).


Parts drying in the kitchen.


Some of the tools I will be using to sand the body, they are a long board, DA sander, sanding board, and an air hose.


I started sanding the hood today. If you notice to the right is what is called "guide coat". I covered the whole hood with it, and then started to the left sanding it off. I sanded it with 80 grit and then I will finish with 180 grit.


Saturday, July 11, 2009

Today I felt like I made big gains on the Galaxie front end. I was able to remove both fenders, the tire wells, radiator, and the support, as well as the windshield wipers, heater box, and last but not least the dash.


This is the driver side front fender, notice the rust to the right. The passenger side is in good shape, but where the battery tray is located, is rusted out, and will need to be replaced.


This is a small video of where the dash once was, and will be again.